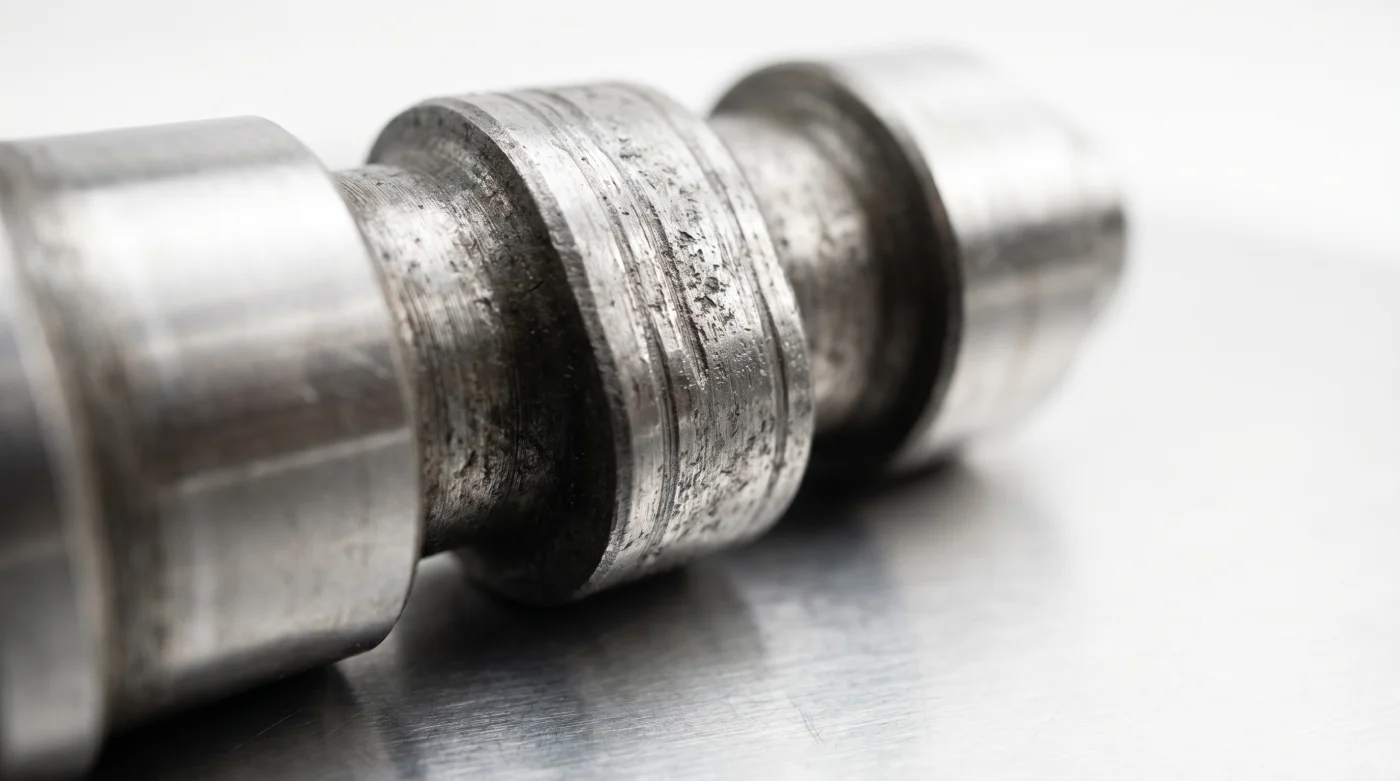
The smell of cold premium gasoline and stale workshop floor wax hangs heavy in the morning air. On a scarred oak workbench, a metallic engine camshaft rests under the harsh glow of a fluorescent tube, its lobes bearing the ugly, telltale scoring of oil starvation and excessive heat. For years, you have been told that modern Japanese inline-fours are indestructible machines that require nothing more than fresh oil and occasional chain wax. It is a comforting lie, whispered by salespeople and echoed in online forums where owners boast of running their machines to fifty thousand miles without ever cracking open the valve cover.
But under the fuel tank of your Kawasaki, a quiet, destructive process is taking place during every high-rpm sprint. As you twist the throttle and the engine screams toward its redline, the valves are slamming into the cylinder head thousands of times per minute. Over time, this constant hammering causes the valve face to recess into the hardened valve seat. Instead of getting looser and making a loud, warning chatter, the valve clearances actually get tighter. You will not hear a thing, but the silent engine wear is slowly choking the life out of your cylinder head.
When the clearance shrinks to zero, the valve can no longer close fully. It remains suspended just a fraction of a millimeter off its seat during the combustion stroke. Without physical contact with the cylinder head to transfer its heat, the valve head rapidly overheats, warping and glowing red-hot until the metal literally melts away. This is not a slow wear cycle; it is a sudden, catastrophic loss of compression that turns a legendary powerplant into a heavy paperweight.
The Metaphor of the Suffocating Runner
Think of your engine as a marathon runner trying to perform while breathing through a thick, wet pillow. When the valve clearances tighten beyond their limits, the engine loses its ability to exhale properly. This phenomenon is particularly dangerous because it defies standard mechanical intuition. Most riders associate engine wear with noise—piston slap, timing chain rattle, or loose lifter tap. In the world of high-revving Kawasaki cylinder heads, silence is the warning sign that something is going terribly wrong.
When you start your bike on a crisp morning, a tight valve might still seal well enough to allow the engine to idle smoothly. However, as the metal expands with operating heat, that tiny clearance vanishes completely. The bike may begin to start hard when warm, or stall unexpectedly at traffic lights. Many mechanics will blindly blame bad fuel, dirty fuel injectors, or a weak battery, completely ignoring the mechanical reality hiding beneath the valve cover.
A Hidden Danger Spelled Out in Georgia
Craig Vance, a fifty-two-year-old independent race mechanic operating out of a quiet shop in northern Georgia, sees the consequences of this neglect every week. “Riders believe these bikes are appliances,” Craig says, pointing to a scarred camshaft on his bench. “They bring me a Ninja 1000 that feels soft on the top end, and I find three exhaust valves holding open. By the time the rider notices the power loss, consequences of this neglect have already burned the exhaust valve seats beyond repair.”
- Tesla Model Y rear wheel drive hides a superior urban turning radius
- Ford Bronco factory orders hide a massive secondary dealer markup clause
- Ford Bronco recall updates secretly alter the roof latch mechanics preventing catastrophic highway detachments
- Chevy dealership algorithms actively hide base model trucks featuring identical premium towing hardware
- Ford V8 AC Cobra Coupe revivals suffer severe engine overheating behind restrictive vintage grilles
Tailoring Your Inspection to Your Machine
Not every Kawasaki engine experiences valve wear in the exact same manner. Your riding style and the specific design of your powerplant dictate how quickly those clearances will disappear into the danger zone.
The High-Revving Commuter (Ninja 400 & ZX-6R)
These smaller, high-rpm engines spend their lives screaming in the upper half of the tachometer. Because they rev so high, the valve train experiences incredible kinetic forces. For these models, checking the clearances at the fifteen-thousand-mile mark is not a suggestion—it is a mandatory survival milestone. If you regularly commute on the highway or enjoy weekend track days, you should expect to find high-rpm engine wear affecting at least two or three exhaust valves during your first inspection.
The Long-Haul Cruiser (Concours 14 & Versys 1000)
These larger engines run cooler and at lower average RPMs, but they are subject to long hours of continuous thermal stress. While they may seem more robust, the heavy weight of these touring machines means the engine is constantly working under load. Do not let the smooth power delivery fool you into skipping the maintenance schedule. Neglecting the valve adjustment on these mile-munching machines is a fast track to a ruined vacation on the side of an interstate.
A Mindful Guide to the 15,000-Mile Adjustment
Adjusting the valves on a modern motorcycle requires patience, cleanliness, and a methodical approach. It is a mechanical ritual that cannot be rushed, requiring you to work in fractions of a millimeter to restore the engine’s original breathing geometry.
Before you begin, ensure your workspace is immaculately clean, as even a single grain of sand falling into the exposed cylinder head can cause severe damage. The engine must be stone-cold—meaning it has sat untouched for at least twelve hours—before you take any measurements. Approaching the task with patience, cleanliness, and methodology ensures you will protect the tight tolerances of the valvetrain.
- Remove the valve cover: Take your time routing wires and coolant hoses out of the way to prevent debris from falling into the valvetrain.
- Rotate to Top Dead Center: Use a socket on the crankshaft to bring each piston to the top of its compression stroke, ensuring the camshaft lobes point away from the lifters.
- Measure with feeler gauges: Slide the gauges between the cam lobe and the bucket. Write down every single measurement on a clear diagram of your cylinder head.
- Calculate the new shim size: If a clearance is out of spec, remove the camshafts and replace the small metal shim with one of the precise thickness required to restore the correct gap.
To perform this job correctly, you will need a highly specific set of tools. Do not attempt to guess or use makeshift instruments, as the tolerances here are thinner than a human hair. Taking the time to remove the valve cover properly is the first step toward reclaiming your bike’s peak efficiency.
Once you have measured the gaps, you will likely need to adjust at least half of the exhaust valves back to the middle of their specified range. This process requires a steady hand and a set of quality metric shims. When you reassemble the camshafts, torque every bolt in the correct sequence to prevent binding and ensure the correct valve clearances are maintained under high thermal stress.
The True Reward of Precision Maintenance
When you finish buttoning up the valve cover and press the starter button, the reward is immediate. The engine settles into a crisp, stable idle that feels noticeably sharper than before. You ride with the peace of mind that comes from knowing your engine is breathing exactly as its designers intended, protected against the silent killer of valve recession.
Taking control of this maintenance task changes your relationship with your machine. You are no longer just a rider consuming a product; you are the guardian of the longevity of your engine, ensuring it will run flawlessly for years to come.
“A tight valve makes no noise until it destroys your cylinder head; listen to the silence.” – Craig Vance, Master Mechanic
| Key Point | Detail | Added Value for the Reader |
|---|---|---|
| The 15,000-Mile Red Line | The exact mileage where Kawasaki exhaust valves tighten significantly. | Prevents catastrophic cylinder head burnout before symptoms appear. |
| The Tightening Illusion | Wear causes valves to tighten and become silent, rather than loose and noisy. | Dismantles the dangerous myth that a quiet engine is a healthy engine. |
| Precision Shimming | Replacing small metal shims under the cam buckets to restore proper clearances. | Saves thousands of dollars in premature cylinder head and engine replacements. |
Frequently Asked Questions
How do I know if my Kawasaki motorcycle valves are tight without opening the engine?
You cannot know for certain without physical measurement. However, warning signs include hard starting when hot, erratic idling, and a subtle loss of top-end power.Why do exhaust valves tighten faster than intake valves?
Exhaust valves operate under extreme heat from escaping combustion gases, which causes the valve face and seat to wear down and recess much faster than the cooler intake valves.Can I just wait until the engine starts running poorly to adjust the valves?
No. By the time you notice poor performance, the valves have likely already begun to burn, which requires expensive cylinder head repair rather than a simple shim adjustment.What tools are absolutely required for a Kawasaki valve adjustment?
You will need a set of high-quality metric feeler gauges, a micrometer to measure shims, a torque wrench, and a model-specific shim kit.How long does a typical Kawasaki valve clearance adjustment take?
For a beginner working carefully, the process typically takes between four to six hours, as you must remove the bodywork, tank, airbox, and sometimes the camshafts.