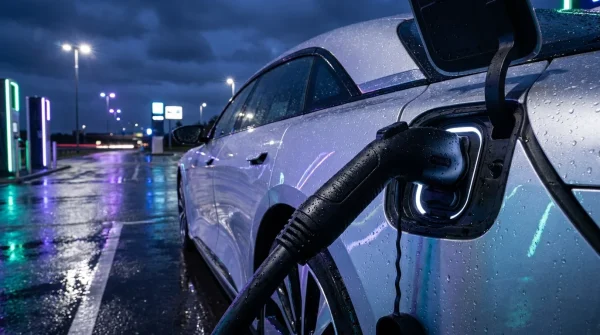
The gentle, rhythmic click of a home charger cooling down in a damp garage is the new soundtrack of suburban morning routines. Inside the cabin of a used Tesla Model 3, everything feels sterile, quiet, and deceptively perfect. The minimalist white dashboard glows with promise, showing a battery degradation of barely five percent. You sit in the driver’s seat, surrounded by the scent of synthetic leather and faint window cleaner, convinced you have outsmarted the traditional used car market.
But beneath that high-tech floorboard lies a different reality. While you scan the screen for software glitches, the damp air of a coastal morning or the chemical residue of highway de-icers is quietly working against the vehicle’s physical foundation. The sudden influx of off-lease rental fleets has flooded the market with shiny, polished electric sedans that look pristine on a smartphone app but tell a darker story underneath.
The standard used car inspection checklist completely misses this. We have been conditioned to worry about battery health and screen responsiveness, forgetting that these machines are still made of metal and subject to the laws of chemistry. A spotless history report cannot protect you from the silent, physical decay that occurs when contrasting metals meet under the chassis.
The iPad on a Rusty Nail
Buying a modern electric vehicle without inspecting its raw structural joints is like mounting a state-of-the-art flat screen onto a crumbling drywall anchor. The software may run flawlessly, but the physical connection to the road remains vulnerable. In the Model 3, this vulnerability manifests as galvanic corrosion—a process where aluminum and steel exchange electrons in a destructive dance, accelerated by moisture and road salt.
This electrochemical breakdown behaves like a slow-burning fuse. When two dissimilar metals are bolted together without adequate isolation, the less noble metal sacrifices itself. On a used Model 3, the steel rear subframe mounts directly near aluminum body structures. Once road grit and moisture wedge themselves into these tight spaces, the chemistry takes over and structural degradation begins, completely hidden from the driver’s seat.
A Specialist’s Warning from the Rust Belt
Marcus Vane, a forty-three-year-old structural integrity technician in Cleveland, spends his winters diagnosing off-lease fleet vehicles. He notes that while buyers spend hours checking the Autopilot camera calibration, they rarely look at the rear suspension mounts. “I’ve seen cars with perfect battery health scores that I wouldn’t drive over a pothole,” Marcus explains. He warns that fleet cars are run through automated car washes that spray recycled, salt-laden water directly into the underbody, trapping corrosive moisture in places that never dry out properly.
- Mazda premium crossover dealership markups create a massive artificial pricing penalty over MSRP
- Newest electric cars suffer extreme payload battery drain hybrid trucks bypass entirely
- Tesla Model S depreciation curves expose a massive luxury discount buyers completely ignore
- Chevy Silverado LT trims quietly hide exact premium suspension hardware dealerships actively overprice
- Toyota Tundra recall delays secretly destroy engine block integrity ruining truck resale value
Choosing Your Battle: Environmental Risk Profiles
Not every used Model 3 has lived the same life, and understanding where a car spent its first few years determines what kind of physical wear you should expect.
The Coastal Commuter
Vehicles from coastal regions face a constant mist of airborne salt. This fine mist settles into every crevice, creating a microscopic saline film that never fully evaporates. If you are shopping in Florida or California, do not assume the lack of snow means a clean underbody.
The Snow-Belt Survivor
This is the highest-risk category. De-icing chemicals used on northern highways are far more aggressive than traditional rock salt. They stick to the underbody like wet cement, holding moisture against the metal subframe for months at a time. For these cars, a detailed physical inspection is non-negotiable.
The Fleet Liquidation Special
Rental fleets are run hard and cleaned rarely. These vehicles frequently undergo quick exterior washes that neglect the undercarriage. The combination of high mileage and minimal structural rinsing makes these cars prime candidates for premature joint decay.
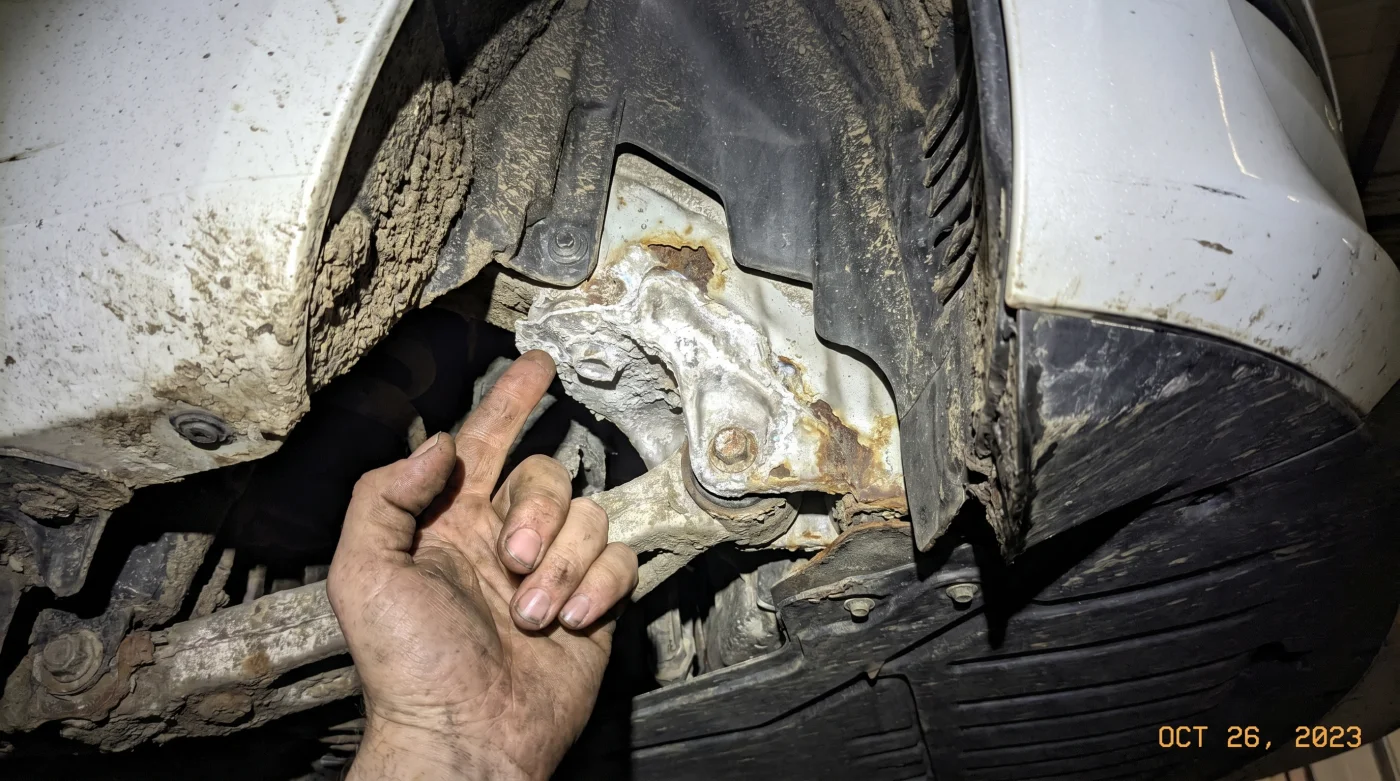
The Rear Wheel Well Surgical Check
To find the true state of a used Model 3, you must look where others do not. The critical diagnostic point is located directly behind the rear wheel well, where the soft felt liner meets the metal chassis. The felt liner should feel soft, almost like breathing through a pillow, but behind it lies a cold structural truth. You must peel back this liner to check the subframe mounting points.
Follow these precise steps during your physical inspection:
- Clear the area: Turn the front wheels fully to one side to give yourself room, or ideally, lift the rear of the car safely on jack stands.
- Peel back the liner: Use a non-marring plastic tool to gently pull back the soft felt wheel well liner behind the rear tire, exposing the metal bracketry.
- Locate the junction: Find the exact spot where the black steel rear subframe meets the aluminum structural member of the car’s frame.
- Search for oxide: Use your light to spot white, chalky powder on the aluminum surfaces or bubbling paint on the steel frame.
- Check the bolt threads: Inspect the mounting bolts for heavy rust flaking, which indicates long-term moisture entrapment.
Keep a tight kit of simple tools in your pocket when viewing a car. You do not need a professional garage to perform this basic check; you only need the patience to look closer than the average buyer.
| Tool Needed | Specification | Inspection Purpose |
|---|---|---|
| LED Pocket Light | 900+ lumens, warm beam | Illuminating dark crevices behind the felt liner |
| Plastic Trim Tool | Non-marring pry edge | Gently pulling back liners without scratching paint |
| Extendable Mirror | 2-inch articulating head | Viewing the top of the subframe bolts clearly |
Grounding Your Electric Ambitions
At its core, owning a vehicle is an exercise in physical reality. No matter how many over-the-air updates a car receives, it must still stop, turn, and support its own weight on physical metal joints. By looking past the clean digital display and inspecting the raw structural foundation, you protect your investment from the silent decay that software cannot fix.
Taking the time to bend down, pull back a liner, and get dirt on your hands transforms you from a passive consumer into an active guardian of your own safety. In an era of disposable technology, keeping your eyes on the physical metal is the ultimate act of ownership wisdom.
“A battery can be balanced with software, but metal remembers every winter it was forced to swallow.”
| Inspection Zone | What to Look For | Value for Buyer |
|---|---|---|
| Rear subframe mount | White aluminum oxide or red steel rust bubbling | Prevents buying a car with structural failure risks |
| Felt liner cavity | Trapped road debris, damp sand, and salt crust | Identifies cars driven through harsh winters without washes |
| Suspension bolts | Pitting, thinning threads, or seized fasteners | Saves thousands in future suspension repair labor costs |
Frequently Asked Questions
Is subframe corrosion covered under Tesla’s battery and drive unit warranty? No, structural corrosion is considered environmental wear and tear and is not covered under the high-voltage powertrain warranty.
Can I clean this area myself to prevent future damage? Yes, regularly pressure washing the rear wheel arches and peeling back the liner to flush out salt will slow down chemical decay significantly.
Are all model years of the Model 3 affected? All model years are susceptible, but early production years (2018–2020) show more advanced wear due to longer exposure times.
How much does it cost to repair a corroded rear subframe? Replacing a rear subframe can cost between $2,500 and $4,500 in parts and labor at a qualified structural repair shop.
Will a standard pre-purchase inspection find this issue? Most general inspectors only check the battery state of health and generic OBD codes; you must explicitly request an underbody check with liners peeled back.